How to Measure For Wood Exterior Shutters
Measuring instructions are written by ShutterLand, a U.S. exterior shutter specialist with over two decades of hands-on experience sizing for residential homes and commercial properties.
The right shutter size starts with how the shutters will be installed. Functional shutters need to fit and close properly, while stationary shutters are sized for their appearance beside the window.
Use a steel tape measure, pencil and paper to record your measurements. Measure every window individually, even when several openings appear identical.
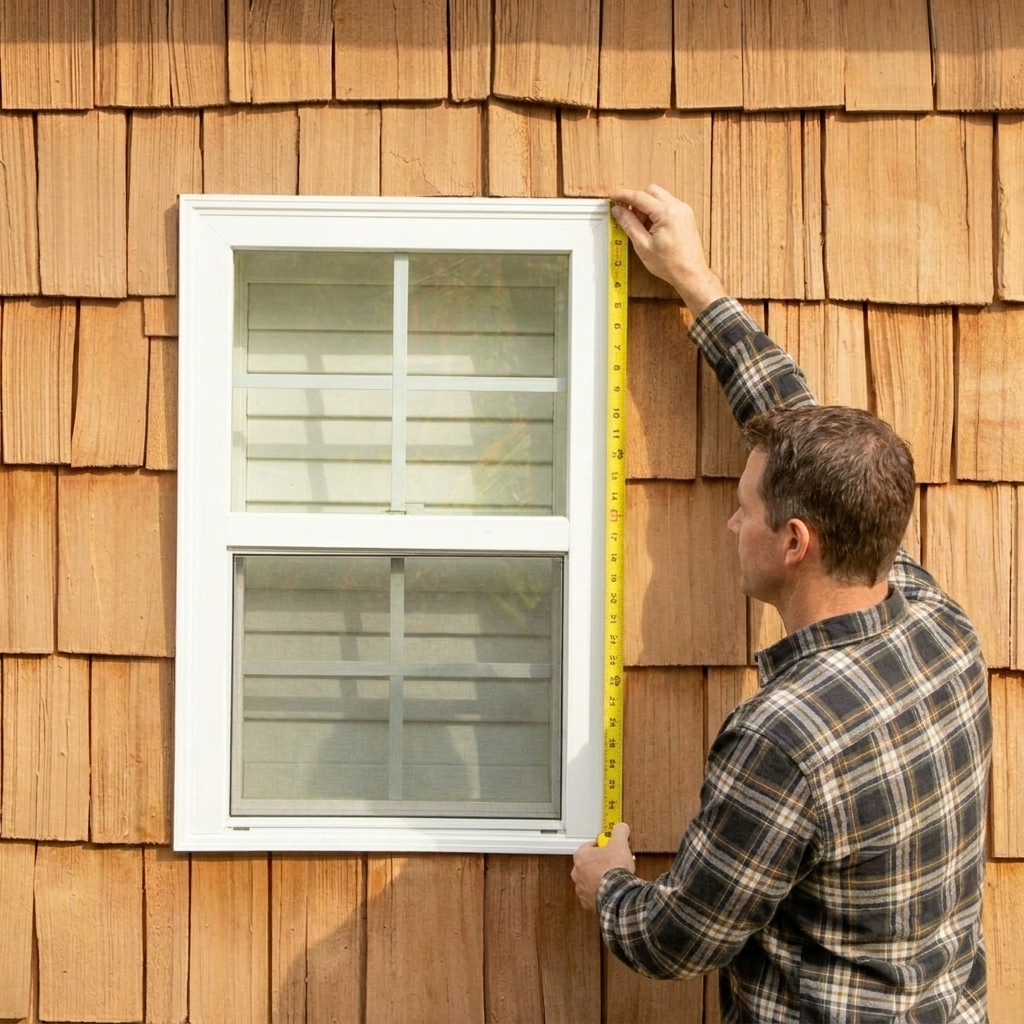
Choose Your Installation Method
Before measuring, decide whether your exterior wood shutters will be functional or stationary.
Functional shutters mount on hinges and swing open and closed. They can close inside the window opening or in front of the window casing, depending on the available depth and hardware.
Stationary shutters remain fixed beside the window. Their dimensions should complement the opening and fit the available wall space.
These instructions cover side-mounted colonial style wood shutters. For top-hinged shutters, use our separate Bahama shutter measuring guide.
Inspect the Window and Surrounding Space
Check for downspouts, building corners, neighboring windows and other features that could interfere with the shutters. Functional shutters also need a clear path to swing open and enough room to rest beside the window.
Inspect the window casing and planned attachment points. Repair damaged or decayed wood before installation, and confirm that the mounting surface can support the shutters and hardware.
Label each window on your measurement sheet so its dimensions and shutter selections stay together.
Measure for Functional Shutters Inside the Opening
For this installation, the closed shutters fit between the window jambs, beneath the head jamb and above the sill.
Check the Available Depth and Select Hinges
Measure the usable recess where the closed shutters will sit. Account for projecting window components, screens or other obstructions.
Check the thickness listed on the selected shutter’s product page. Premium wood louvered and solid panel shutters are 1½ inches thick, but the full installation also needs to accommodate the hinges and clearance behind the shutter.
Choose compatible exterior shutter hardware before finalizing the dimensions. The selected shutter hinges allow the panels to close within the opening and swing clear of the casing. Shutter dogs, or tiebacks, hold shutters in an open position.
Measure the Width
Measure the clear opening from the inside left jamb to the inside right jamb at the top, middle and bottom. Record the smallest measurement.
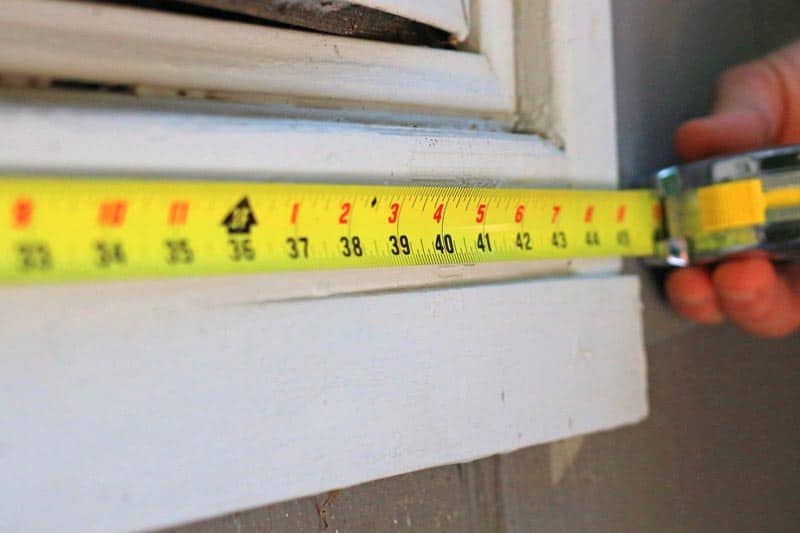
For two equal shutters:
Individual shutter width = (smallest opening width − total required horizontal clearance) ÷ 2
The total horizontal clearance includes the gaps at the left side, between the two shutters and at the right side.
If one shutter will cover the entire opening, do not divide by two. Confirm that the selected product and hardware can accommodate the required size and weight.
Measure the Height
Measure from the underside of the head jamb to the sill at the left, center and right. Record the smallest measurement.
Individual shutter height = smallest opening height − total required vertical clearance
The vertical allowance includes the gaps above and below the shutter. Check for a sloped sill or other features that could affect closing.
Measure for Functional Shutters in Front of the Casing
When exterior shutters close in front of the window casing, establish their intended closed position with the selected hinges before measuring.
Confirm where the hinges will attach, how far the shutters will sit from the wall and whether they will clear the casing and sill. The hinge offset determines how the shutters move between their open and closed positions.
Measure the Width
Mark the intended left and right outside edges of the closed shutters. Measure the distance between these points.
For a pair of equal shutters, account for the required center gap and any adjustments specified for the hardware, then divide the resulting width by two.
Measure the Height
Mark the intended top and bottom of the closed shutters and measure between those points. Confirm that the bottom edge will clear the sill throughout the swing.
Our wood shutter installation guide explains the mounting procedure.
Measure for Stationary Wood Shutters
Stationary shutters do not need to close over the window, but they generally look most natural when their proportions suggest that they could.
Choose the Width
Start with approximately half the window opening width for each shutter. Then check whether that size fits beside the window without crowding adjacent shutters, downspouts or corners.
For wide windows or grouped windows, a narrower decorative shutter may be more appropriate. There is no single width ratio that suits every arrangement. Consider the window proportions, available wall space and the size range of the selected shutter.
A cardboard template held beside the window can help you compare widths before ordering.
Choose the Height
For a traditional appearance, align the shutter with the top and bottom of the window opening. Where there is a projecting sill, position the bottom of the shutter above it.
If the surrounding trim provides a more appropriate visual alignment, use those reference points consistently across similar windows.
Record the finished dimensions that create the intended appearance.
Establish Divider Rail and Batten Locations
A divider rail separates a shutter into upper and lower sections. Aligning it with a prominent horizontal window feature can create a more coordinated appearance.
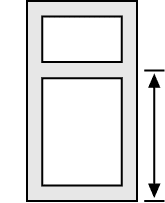
For a custom position, measure from the bottom of the shutter to the center of the divider rail.
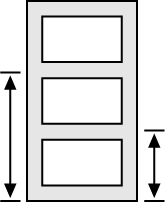
For two rails, record both measurements from the bottom of the shutter.
On louvered shutters, the final rail position may vary slightly to accommodate the louver spacing.
Divider rail requirements depend on the shutter style and height. For example, premium wood louvered shutters require a divider rail at 90 inches or taller. Check the selected product page for its available configurations.
Wood board and batten shutters use horizontal battens rather than divider rails. Review the product’s batten requirements and coordinate their positions with any planned hinges.
Measure for Arch-Top Shutters
Arch-top shutters require additional measurements to establish the curve and its orientation.
Check the selected product’s ordering instructions for the required overall dimensions, springline measurement and left or right arch selection. A typical pair requires one left and one right shutter.
Refer to the arch-top shutter guide before ordering.
Check Your Measurements Before Ordering
Review each window and confirm:
- The installation method and mounting position.
- The finished width and height of each individual shutter.
- The selected product’s available sizes and measurement increments.
- The required operating clearances and compatible hardware.
- Any custom divider rail positions or arch-top selections.
- The total number of individual shutters needed.
Enter the finished shutter dimensions in the order form.
Wood shutters are ordered individually. Most windows require two shutters, but some installations need only one, and individual ordering also allows you to replace a single shutter.
If you need help determining the right size, contact ShutterLand before placing your order.